Cutting Marble Pencil Trim: Precision and Artistry
In the world of stonework and interior design, marble pencil trim has become a coveted element for adding elegance and refinement to spaces. Its slender profile and smooth finish make it ideal for creating clean edges or highlighting architectural features. However, working with marble pencil trim requires precision and expertise, especially when it comes to cutting. This article will guide you through the process of cutting marble pencil trim, offering tips and insights to ensure your projects achieve the desired aesthetic.
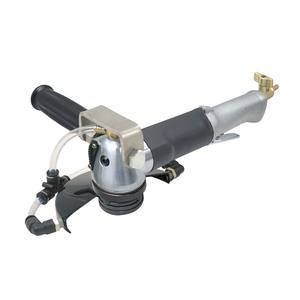
Choosing the Right Tools for Cutting Marble Pencil Trim

Before diving into the cutting process, selecting the appropriate tools is crucial. For marble pencil trim, a wet saw with a diamond blade is often the best choice. These specialized tools allow for accurate cuts while minimizing chipping or cracking along the edges. Additionally, consider investing in a water pump to keep the blade cool and reduce dust during operation.
Techniques for Cutting Marble Pencil Trim Efficiently
Efficiency is key when cutting marble pencil trim, as it helps maintain consistency across all pieces. Start by marking the cut lines on the trim using a permanent marker. This step ensures that every piece is cut to the exact same length, which is essential for achieving a seamless look in your final installation. When operating the wet saw, apply steady pressure and follow the marked lines carefully. Remember, slow and steady wins the race, especially when working with delicate materials like marble.


Tips for Achieving Smooth Edges When Cutting Marble Pencil Trim
One of the biggest challenges in working with marble pencil trim is achieving smooth, polished edges without any chips or rough spots. To accomplish this, take your time with each cut, ensuring the blade is running smoothly and not binding against the material. After cutting, use a fine-grit sandpaper or a polishing pad designed for stone to gently remove any imperfections from the edges. This extra step will enhance the overall appearance of your trim and help it blend seamlessly with surrounding surfaces.
Safety Precautions When Cutting Marble Pencil Trim
Safety should always be a top priority when handling any type of construction or renovation project. When cutting marble pencil trim, wear protective gear such as safety goggles, gloves, and a dust mask. The dust produced during cutting can be harmful if inhaled, so proper ventilation is also important. Keep your workspace organized and free of clutter to avoid accidents, and never attempt to adjust the trim or tool while the blade is still moving.
Troubleshooting Common Issues in Cutting Marble Pencil Trim
Despite careful planning and execution, issues may arise during the cutting process. Common problems include jagged edges, uneven cuts, or even breakage. If you encounter these challenges, reassess your technique and tools. Sometimes switching to a higher-quality blade or adjusting the speed at which you’re cutting can make a significant difference. Practice on scrap pieces until you feel confident in your ability to produce clean, precise cuts consistently.
Final Thoughts on Cutting Marble Pencil Trim
Mastering the art of cutting marble pencil trim not only enhances the beauty of your projects but also demonstrates your commitment to quality craftsmanship. By following these guidelines, you’ll be well-equipped to tackle even the most intricate designs with confidence. Remember, practice makes perfect, so don’t be discouraged by initial setbacks. With patience and persistence, you’ll soon be creating stunning marble pencil trims that elevate any space they grace.
报错: 未找到这个表单

Automatic Continuous Edging Machine Th...

Bridge Stone Saw Scope of applicat...

Concrete Cutting Machine Concrete ...

Diamond Rope Saw Description: The f...
